The first thing to realize is that clientless SSL access is nothing more than a web page hosted by the ASA and using a self signed cert it's extremely easy to setup. What we are going to configure is much more involved...
Lets say you have a cable modem or DSL connection and you want to extend SSL VPN access to the outside world (at least those that have a valid account) you can do this by configuring your outside interface to accept connections (as well as DTLS - Datagram Transport Layer Security).

The next step is to define an address pool for this group of people coming in. In this case we have chosen a subset of the already established 192.168.168.0/24 network that is considered "inside". We have selected 192.168.168.220/30 - 192.168.168.221 and 192.168.168.222 since we only have the two free SSL licenses that came with the ASA....
Under the Configuration/ Remote Access VPN is a section labeled Network (Client) Access. Inside that you will see the address pool section. Simply create a pool and name it.

Now click on assignment policy and ensure that you have "use internal address pools" selected.

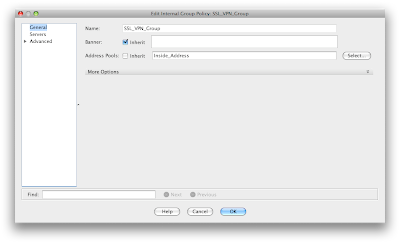
OK now we have access allowed in and a pool of addresses to give out. Lets create a group policy for these users under the Network (Client) Access. Add one called SSL_VPN_Group (if it's not already in place). Under the address pool section uncheck the inherit and select the pool we created.

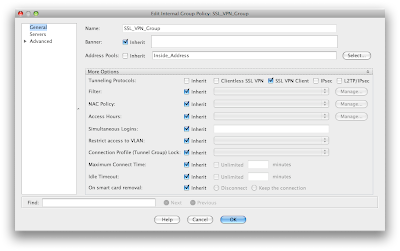
Under the more options section you will need to select the SSL Client option to ensure that you are accepting connections under this policy for AnyConnect users

under the servers options you can define your own internal DNS and WINS servers (WINS... haaa). In any case an internal DNS server is useful when users connect and want to resolve internal resources.
Under the more options in this section is the domain attribute that you can pass to the clients connecting. Again, a good thing to configure.
If you want to accept traffic that is destined to just your network then in the advanced section of the policy uncheck the inherit on split tunnel policy and choose "Tunnel Network List Below". Same goes for the Network List selection - uncheck this and define the list of networks that you want to accept traffic for.
**** Tons and tons of configuration options in the policy. For now we are going to leave everything as is and take the inherit settings.
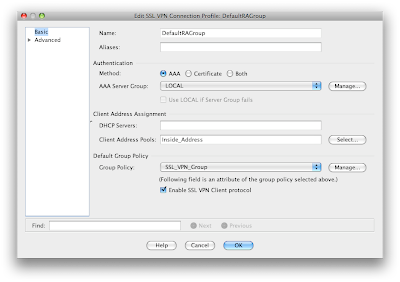
Now lets go back to AnyConnect connection profiles and select one. In this case I have used the Default RA Group and modified the settings. Make sure you remember to check the box to enable this.

Now click on edit and lets get that address pool we created and the group policy we worked so hard on connected to this profile -

Under the advanced section in client addressing ensure that you have selected the "Use Address Pool" ** This really makes little sense since we already stated in the Address Assignment Policy how we wanted to hand out addresses. Man - 10,000 options.
Also under advanced settings you can select the interface that is doing the authentication - in this case the outside interface and the local database (or a radius server).
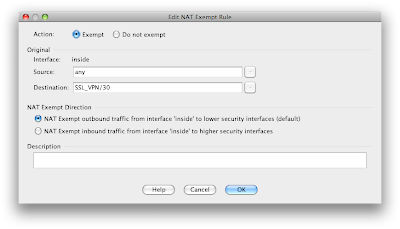
OK.... wow that was a lot. Lets connect and get going, right? Nope. You can connect, pass the authorization get a policy and an IP assigned (even DNS and domain) but you can't route anywhere... You need to exempt the traffic from NAT. This is done under the firewall NAT rules and states that traffic sourced from anywhere destined for the SSL_VPN /30 address range is exempt.

Here are the details of the NAT policy.

That should be it. Happy connecting.

